How to choose a heating element for an incubator
If you are ready to assemble the incubator with your own hands, then the information is for you. We will tell about the incubator device in articles devoted to this topic, where we will try to tell in detail all the nuances and secrets of its design and construction.
And now let's focus on the heating element, which is worth installing in a makeshift incubator. Consider several types and talk about their pros and cons.
So, you can warm:
1. Carbon fiber heating cord.
Widespread use: it can act as heating pipes or beds, floor heating in the chicken coop, well, for a warm floor at home.
When calculating the length, you can make a mistake, and this can lead to sad consequences, up to a fire.
Winding must be done carefully on non-conductive electricity elements (textolite, fluoroplastic, ceramics). The installation itself must be done carefully so as not to damage the braid.
Conclusion: With all the minor disadvantages, this type of heating element is one of the best on the market. The main thing is to correctly calculate the length of the heating cable. For this, our website has a calculator and a table. And remember that you should not pump more than 18 watts of power into 1 meter of a Chinese heating cord.
Optimum windings for incubators will be given in Appendix No. 2 at the end of the article.
2. Ten
It can be damaged if damaged mechanically.
Fast heating.
Pre-known capacity - specified by the manufacturer.
It does not change its resistance sharply and is considered a resistive load, i.e. it can be connected directly to the thermostat without fear that its relay will fail.
Relatively simple installation and connection directly to the contacts of the thermostat.
Inertia is one of the "fat" minuses of this type of heating element.
The desired size + power must be sought and selected to fit your needs.
Heating directly depends on the voltage in the network, so it is advisable to use a stabilizer if the incubator is operated, for example, in a village.
Conclusion: Pluses seem to be more than minuses. However, the first two main disadvantages (the first one can be solved), cover almost all the advantages of this heater.
3. Nichrome wire
Connection is possible to 12 - 24 Volt DC or 220 Volt AC.
Fast heating - quick cooling.
Lack of inertia, due to this, a span in temperature is excluded.
The eternal heater, provided that the winding is correctly calculated depending on the supply voltage.
It does not change its resistance sharply and is considered a resistive load, i.e. it can be connected directly to the thermostat without fear that its relay will fail.
Sometimes hard to find in stores.
If you make a mistake with the length of the winding and the supply voltage, it can lead to burnout of the wire.
Conclusion: If you plan to make a small incubator with the ability to work on battery, then this is one of the best decisions to make a heater for the incubator with your own hands. Optimum windings for incubators will be given in Appendix No. 1 at the end of the article.
4. Incandescent lamp
Fast heating, and little inertia
Low cost.
Availability - can be bought at any hardware or car store
Possibility of connection to 12 Volt DC - automobile lamps or to 220 Volt AC.
Simplicity of initial installation and replacement in case of failure.
The biggest minus of incandescent bulbs is that when you start in the first seconds, the resistance of the tungsten filament that is used in them changes dramatically. Because of this, a 25 Watt lamp can be equated to a 250 Watt ten, and a spark slipping between the contacts of the electromagnetic relay in the thermostat can very quickly disable it. There is only one way to solve this problem - installing an intermediate solid state relay. We had several cases with improper connection as a result, the thermostat relay failed and this led to the death of the chicks due to overheating at the incubation stage.
Fragility
Conclusion: Quick, easy, inexpensive, on the one hand. Not very durable, the nuances when using and connecting with another. And most importantly, after all, a light bulb is initially a light source and only then heat, therefore we do not recommend this type of heater.
5. Film for underfloor heating
Heats up quickly and cools down
It has no inertia.
The film itself does not heat the air around it, since it has infrared radiation. Thus, the object in front of the film is heated, in apartments it is a laminate or tile, and they, in turn, heat the air. Under the film, it is necessary to lay a reflective substrate so that the heat does not go to the floor.
Connection only to 220 Volt AC. If you want to power from the battery, you will need to buy an inverter, calculated by the power for your load.
Dear and not everywhere you can buy.
Very often it is sold only with windings or sets together with a thermostat for a warm floor
It has a fixed size (width) and power per 1 sq. M. (150 watts or 220 watts per 1 sq. M.)
6. Ceramic resistances (well, this is if there’s nothing more to heat)
Conclusion:This type will not even be considered, so it can be called the "ancient century" in the presence of other types of heaters on the market.
So, the first thing to do is to immediately determine the supply voltage of our element, which will heat the incubator.
If you plan to make a small incubator with the ability to switch to backup power from the battery and do not plan to buy an inverter, then your choice is a 12 volt heater, which can be made of nichrome, a heating cord or 12 volt car bulbs, provided that external relays are installed. When using nichrome or a heating cord as a heater, it is first necessary to make an accurate calculation of the length of the winding. Otherwise, if a mistake is made, the heater can quickly fail. Power is selected depending on the size of the incubator, the number of eggs and the material from which it is made. In all three cases, it is necessary to use a fan to remove heat from the heating element.
In the event that you are not interested in connecting to the battery or if you plan to make a large incubator, then the heating element should be made of a heating cable, heating element (consider power when choosing), nichrome or incandescent lamps of 220 volts, provided that an external relay is installed. When using nichrome or a heating cord as a heater, it is first necessary to make an accurate calculation of the length of the winding. Otherwise, as in the case of connecting to 12 volts DC, if an error is made, the heater can quickly fail. And remember that if a drawdown below 220 volts starts in the network, the incubator can warm up poorly. If the incubator is built, more than 200 eggs should take care of buying a generator, since dead eggs can cost much more than its cost.
Below are the calculations indicating the power of the heating cord and nichrome, depending on the size of the incubator and the number of eggs. Much depends on the material from which the device is made. Good thermal insulation of the chamber means a stable internal temperature during incubation and lower electricity costs, since the heating element can be set to the lowest possible power.
An incubator is an important apparatus for agricultural activities. It is with its help that young animals are hatched on an industrial scale. Also, many private entrepreneurs and simply owners of small farms are increasingly preferred to this method of hatching eggs over the natural, as it is more convenient and technologically advanced, and a higher result is guaranteed.
Although incubators operating on the mains have been used for several decades, existing models have several disadvantages. Heating and lamp apparatuses consume a lot of electricity, unevenly warm the air, create unnatural conditions for young animals, there is a risk of dangerous situations.
All these circumstances forced developers to seek new solutions. And not so long ago they appeared. The most promising and economical solution to date is infrared heating egg incubators.
The device and principle of operation of the infrared incubator
Different manufacturers of incubators reacted differently to the appearance of infrared heaters, so there are several models on the market. They have a similar design, but some differences are also present.
The structure of a typical infrared incubator
- Form factor: box with a lid.
- Material: wood, plastic, polystyrene foam.
- Capacity: 20-150 eggs.
- Power supply: 220 V, in some models it is possible to work on battery power.
- Automation: temperature controller, some models with a digital display.
- Some devices have the function of turning eggs.
- Operating temperatures: 0-100 degrees, the possibility of regulation in increments of 0.1-0.5 degrees.
- Microprocessor control.
Infrared Incubators can be operated in a wide temperature range, but exclusively indoors. Optimum temperature environment: 5-40 degrees. In this case, humidity should also be maintained at a level of: 50-70%.
The principle of operation and capabilities of the infrared incubator
Modern infrared incubators are suitable for hatching the eggs of any birds and amphibians: ducks, chickens, geese, turkeys, ostriches, quails, parrots, turtles, snakes, geckos, iguanas, crocodiles and many others, if necessary. Working conditions are adjusted in accordance with the requirements for the breeding of specific animals.
Capacity is limited solely by the size of the eggs. Some models provide for the possibility of seizing the mechanism that performs the rotation, in which case the rotation must be carried out manually.
Heating element in infrared incubator is a carbon film heater. From the name it is obvious that heating occurs with the help of infrared rays, in this case we are talking about the far spectrum.
An important feature of this technology is that the heater itself has a temperature of no higher than 45 degrees while maintaining a standard mode of 35.5-38.5 degrees for eggs. This is a definite advantage compared to heating elements and lamps, the temperature of which can reach 150 degrees.
Infrared incubator provides 100% survival for healthy eggs, as it eliminates the very possibility of thermal shock, the most fatal for embryos and taking place in the apparatus of a traditional device. Even a short circuit will not damage hatched chicks or amphibians. Infrared rays warm the shell like the sun, this heat is pleasant for living beings and has useful properties.
The presence of a temperature controller is a decisive factor. Infrared heating does not need human control, since it is done by a microprocessor, which receives information about the current temperature from the temperature sensor. It is possible to set degrees with high accuracy, and the system itself will support them for the right time.
The benefits of infrared heating for egg incubators
- This is the most natural way of hatching, after a hen. Modern technology has many advantages.
- Full automation. The device for turning eggs performs its work with a given frequency, ensuring uniform heating from all sides.
- Optimum humidity. The problem of maintaining a specific humidity level has ceased to exist. It is enough to place a container of water in the box. Fluid under the influence of infrared radiation evaporates at the same speed as when heated by sunlight. It is enough to add water as it evaporates.
- Natural ventilation. The housing has technological holes that provide optimal air exchange.
- Profitability. Infrared heaters consume a minimum amount of electricity, significantly less than lamps and heating elements, which reduces the cost of incubation at times.
Features of the operation of infrared incubators
Use of infrared incubators similar to the use of traditional lamp and TEN devices. They are friendly, as they are as automated as possible and do not require increased attention to their own performance.
It is enough to fill the container with eggs and plug the power cord into a power outlet. All other actions are related to the incubation time and requirements for different breeds of birds and amphibians. The only thing to observe is the temperature and humidity in the room.
Egg incubator infrared heating - safe, affordable and economical solution!
Thermal cord (heating cable).


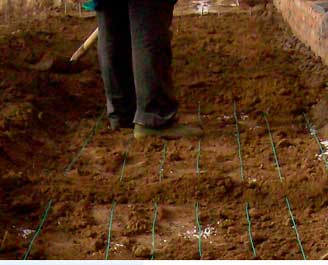
So the Chinese put the heating cord in the greenhouse. Buried directly in the ground and put on the flooring for seedlings. Interestingly, a carrot that grows a little faster pays for the costs of email. energy?
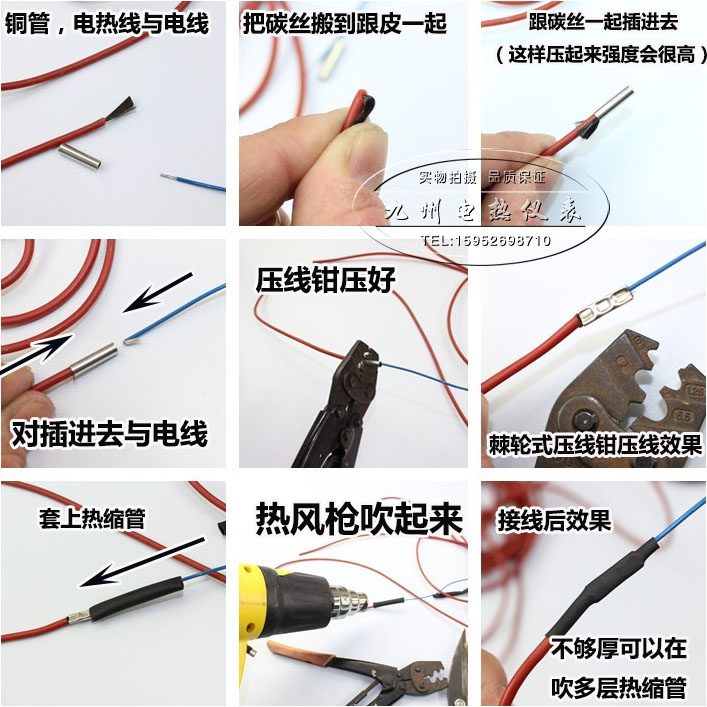
The extreme photo shows how the Chinese connect the thermal cord to a conventional wire and what tools and materials are used for this, I think it’s not necessary to explain, everything is clear from the photo. (Photo clickable)
puddles for extensive heating of something. For example, it is successfully used in the installation of warm floors, heating bedspreads, rugs, etc.
The heating cord is very convenient for heating in the greenhouse, cords are produced specifically for heating the greenhouses (100 meters-1 kW. Power) In general, for anything, because the cord is not afraid of excesses and moisture, it easily fits and cuts to the desired length.
Thermal cords with resistance from 10 to 600 ohm / meter are produced. Based on this, it is easy to calculate the required length or power.
A very important quality of the heating cable, it can be powered by any voltage, literally from 6-12 volts (remember the heated seats in the car) to almost infinity. It is not permissible to just exceed the melting temperature of the cord insulation.
The heating cords are produced in a thermo-moisture-resistant casing (first photo) and without it (cheaper). The former are used anywhere, the latter for the production of various heating pads in places that do not allow high humidity (rugs, rugs, auto seats, etc.)
The calculation of power (length) is possible by the formula. Example: let's say we have a supply voltage of 220 volts, a cord length of 3 meters,
cord resistance is 76 ohms per meter. Consider this: 220x220 / 3x76ohm. \u003d 212 watts.
If with the same parameters the voltage is 127 volts: 127x127 / 3x76 \u003d 70.7 watts.
Or:
Let's say 9 meters of the cord, voltage 220 volts, cord resistance 142 ohms: 220x220 / 9x142 \u003d 38watt
That is, for 100 rubles you can make a good heating pad with power switching.
For a brooding box I use a cord with the simplest temperature controller, so you can smoothly adjust the temperature.
Not all thermal cords are released by meters, often the Chinese do not want to cut and tinker with trifles.
Less than 50 meters, the Chinese do not let go.
The price of the cord depends on the selected material (with a shell or not) and on the length. For a cord with a sheath, the price is 57 rubles per meter., On condition of purchase from 100 meters. Less than 100 meters, the price is 63 rubles per meter.
Or if you take a bay (400 meters, seen in the photo) then the price is 53 rubles per meter.
For a cord without a shell, the price is 39 rubles per meter. Bay 32 rubles per meter.
The cost of a bay for greenhouses (third photo) 1000W - 100m \u003d 3100 rubles.
There were sets, measuring segments of the cord for the manufacture of incubators.
10m 33ohm / meter \u003d 760 rubles, 15 meters - 990 rubles, 20 meters - 1280 rubles.
Ask for other sizes, not always there ....
Answers to some questions I received in the mail:
The thermal cord can be cut as you like, for any number of meters you need. At the same time, you should adhere to the above calculation method.
The thermal cord can be powered with almost any supply voltage, including DC voltage.
The thermal cord can be immersed in water, this is not dangerous provided that there is no damage to the insulation.
The thermal cord can be glued to the surface with tape or silicone.
The heating cord during installation does not solder, the ends are sealed by crimping and protected by heat shrink or electrical tape.
The heating cable can be red, white, blue of any color !!! Therefore, please do not ask how much the red thermal cord costs.
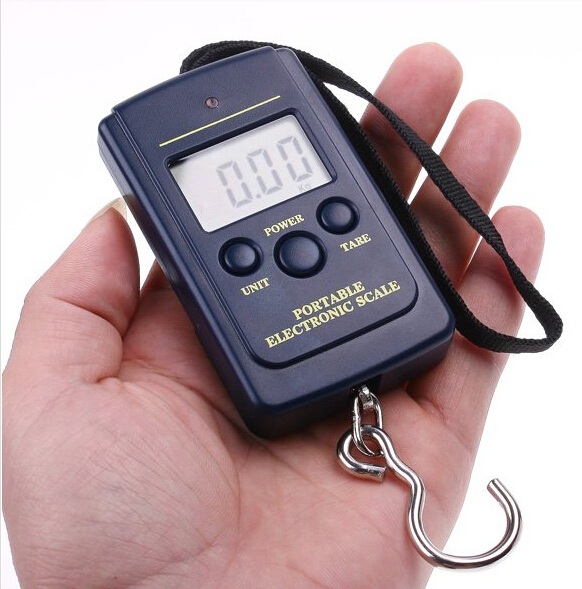 Portable scales up to 40 kg.
Thermostat for greenhouses. (special for heat cable)
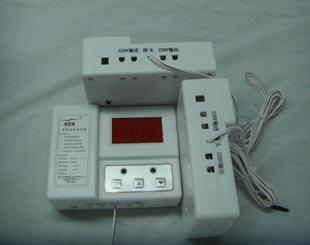
Specially designed for heating cable, a powerful two-channel thermostat for greenhouses and greenhouses.
Power: 5.5KW (resistive); 4.5kw (inductive), power consumption:<3 Вт
Price: 2900 rubles.
Self-adjusting heating cable.


220volt, 17 W / meter, 9mm. width.
The principle of operation of a self-regulating heating cable is visible from the figures above. To put it simply, then: The colder the heating object, it warms more, warmer - on the contrary, less. Accordingly, the power consumption is reduced.
50 meters. Price: 4700 rubles. 10 meters: 1540 rubles. There are other sizes, ask.
Infrared heaters.
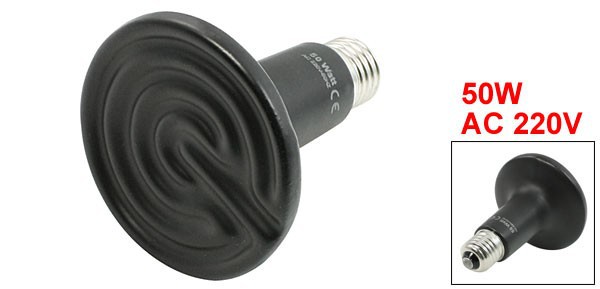


The most ideal and stable heat source for all types of animals.
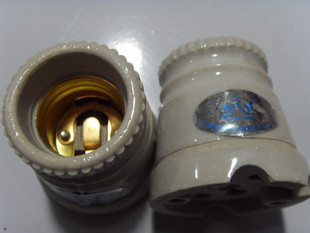
Standard base E-27 under the CERAMIC cartridge.
Voltage 220 V. Power: 25 - 200 watts.
Ceramic infrared lamps belong to the dark ceramic infrared heaters with a standard base. They have various applications, in practice they are used in terrariums and rooms for animals, for breeding animals and plants, in medicine and in the service sector.
They are mainly used for local heating of any living creature from above. Infrared radiation is close to the solar spectrum, therefore it is proved that it has a very favorable effect on living organisms. Chickens grow stronger.
It is very convenient to use heaters swirling instead of an incandescent bulb; heaters with a power of 25-200 watts are produced.
It is advisable to use them together with ceramic lampholders.
Price: 650 rubles. With delivery in Russia.
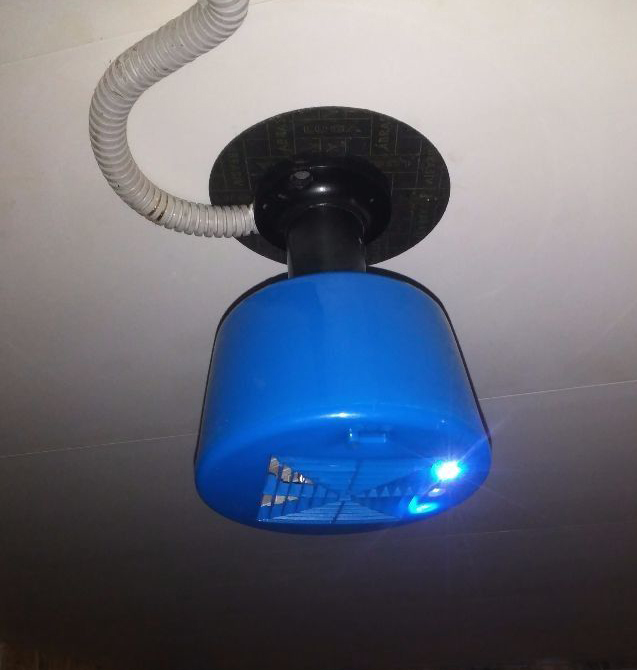
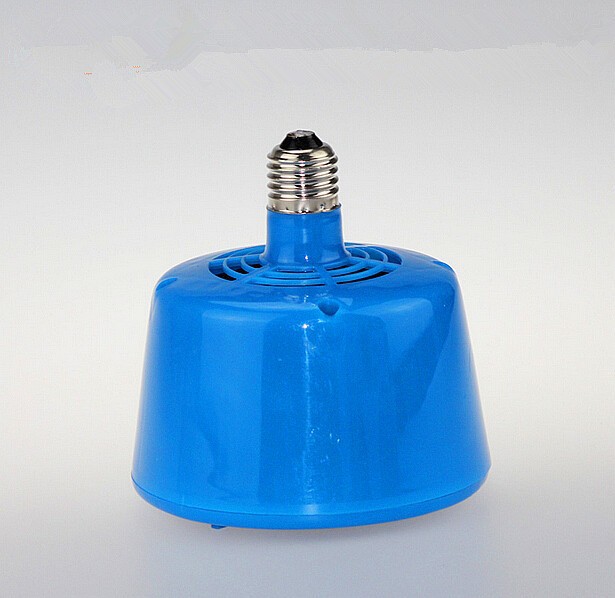


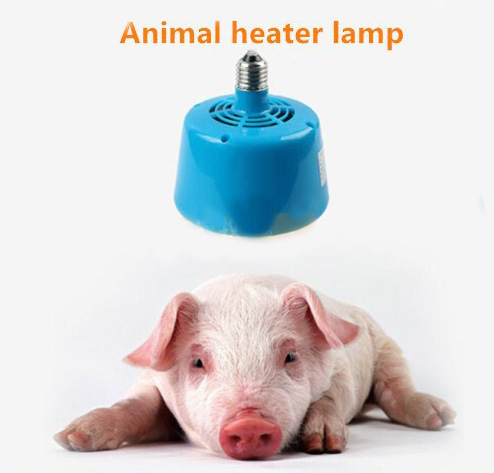
Three high-speed heat fan with backlight. For installation in brooder boxes for heating chickens-quail. Or to heat newborn piglets.
Dimensions: diameter 13.3 cm, height: 14 cm Weight: 400 g
Power: three adjustable modes - 100 W 200 W 300 W
LED lamp power: 1 W
Price: 1100 rubles, with delivery.
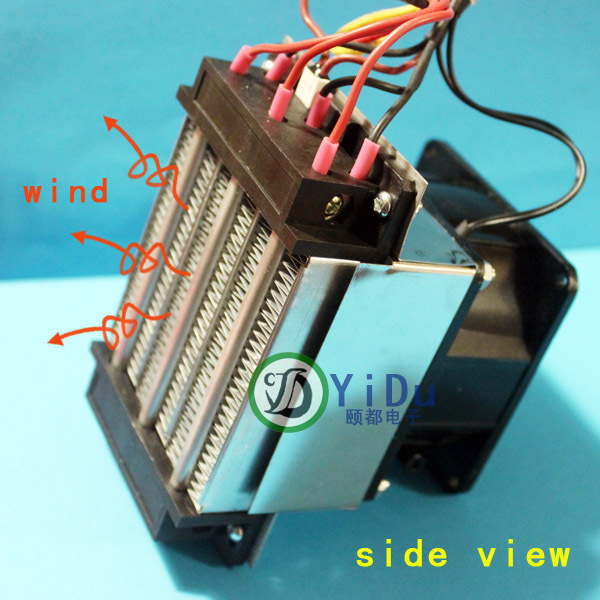
Air Tena.


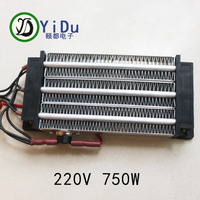

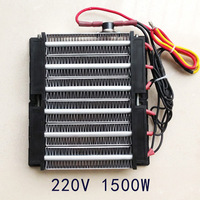


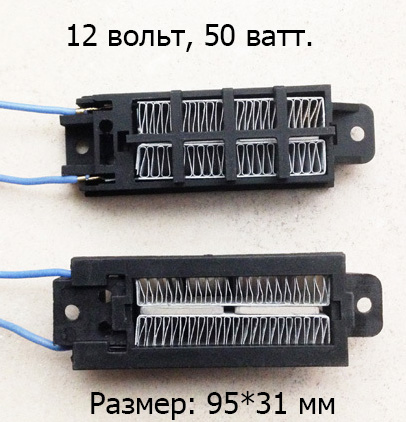
Serve to heat the air in a homemade incubator.
Available in various designs and capacities, a worthy alternative to incandescent lamps and home-made spirals in incubators.
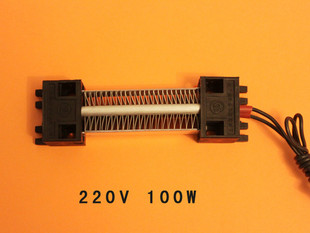
The advantages of these tens are that they have very good heat dissipation, so they do not overheat (of course, you must create sufficient air pressure) and do not create thermal energy that is characteristic of tubular tens. It is very important that a thermal relay is installed on each heating element of 500 watts (see the photo), at the slightest overheating it disables the heating element. Such relays can be installed on any air heater.
In the photo at the top of the heater is 120x55x30 mm in size. power of 500 watts. The price is 1100 rubles.
Below, a heating element measuring 140x35x26 mm with a power of 200 watts, without a thermal relay. The price is 920 rubles.
100 Watt Teng: 113 * 35 * 26mm. Without thermal relay. Price: 640 rubles.
P.S. Air Tenes are issued up to 4000 watts, ask.
For supply voltage: 12-380 volts.
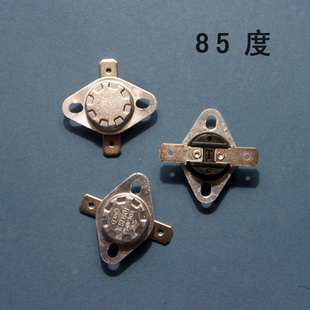 Not all relays install these relays, but you can install the relay yourself on any heater.
As a rule, they are available with the following shutdown temperatures: from 40 to 180 degrees (as normally closed) The photo shows that the relay is 85 degrees off.
Relays are designed for currents up to 5 A.
Price: 130 rubles.
Incubator Kit: Air Ten & Fan.
![]()
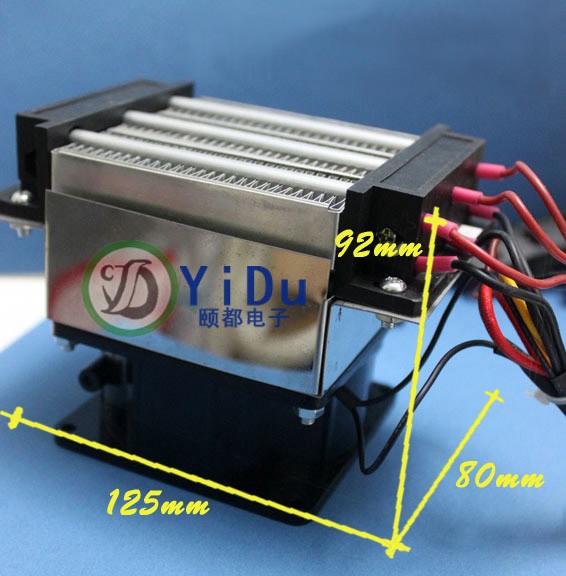
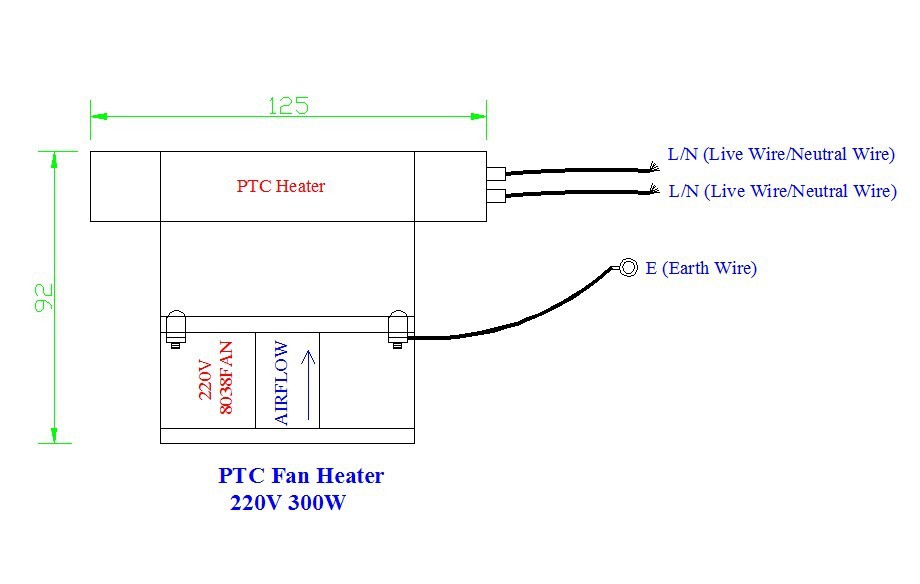
- Voltage: 220 Volt
- Power: 300 W
- Size: 125 * 80 * 92 mm
Price: 2900 rubles.
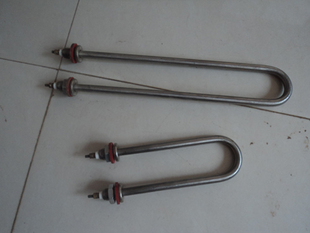
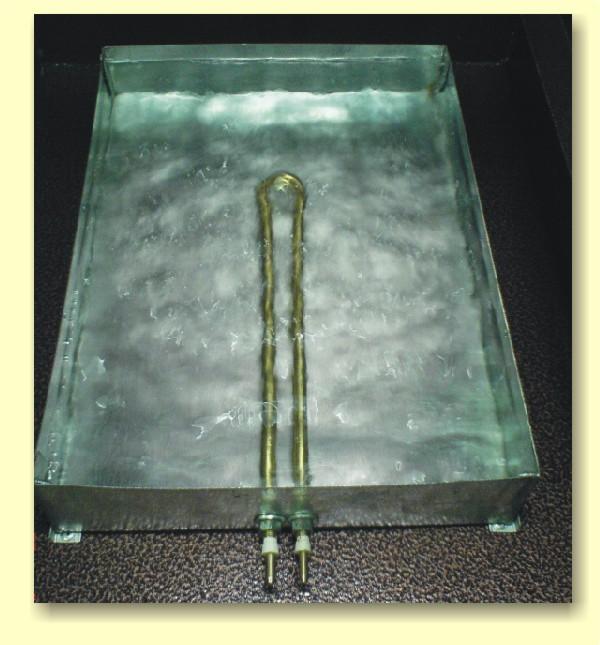
As one of the ways to increase hydration during incubation, apply water heating in the bath.
For this, special low-power heating elements are produced, with a capacity of 200-300 watts. Tena are made in such a way that they can be attached to the bath with water made of galvanized metal through the special gasket included in the kit. The principle of operation is this, the device, when the humidity in the incubator is lowered, turns on the heater, the water is heated and water vapor flows from the fan, moisturize the air in the incubator. A big disadvantage of this method is that you must always look at the water level, otherwise the heater will burn out instantly, which entails the operation of traffic jams and a power outage. If there is nobody in the house, then the incubator elementarily stands up.
Ten power 200 watt, length: 200mm. 300 watts, length: 300mm.
Price: 200.- 600 rubles, 300.- 650 rubles.
As an option to provide the necessary humidity in the incubator, you can install a water pump (ask) and supply water through it to a sponge, for example. From a sponge water, under the influence of an air stream .... This scheme is often used in imported incubators.
Water electro valve for adjusting humidity in the incubator.

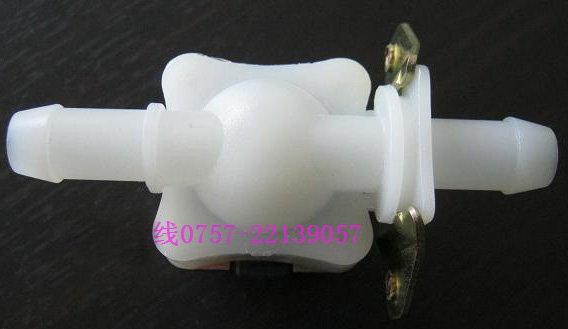
An easier option for adjusting humidity is to install an electric valve. The device works out, the valve turns on and water flows through the tube to the evaporator (sponge, cloth). The valve is released at: 12, 24, 220, 380 volts.
Price: 390 rubles. Temporarily not.
About ways to increase humidity in an incubator:
Centrifugal air blower for a homemade incubator.

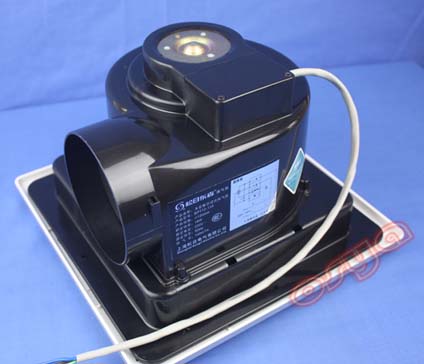

Powerful centrifugal blower fan for a homemade incubator.
On the left is a homemade incubator scheme taken from an Internet,
Here is an example of the use of a supercharger.
Dimensions: 250 x 210 mm. productivity: 140 cubic / m.
Supply voltage: 220 volts.
Price: 3100 rubles.
Powerful axial fan for a homemade incubator with a diameter of 200mm.
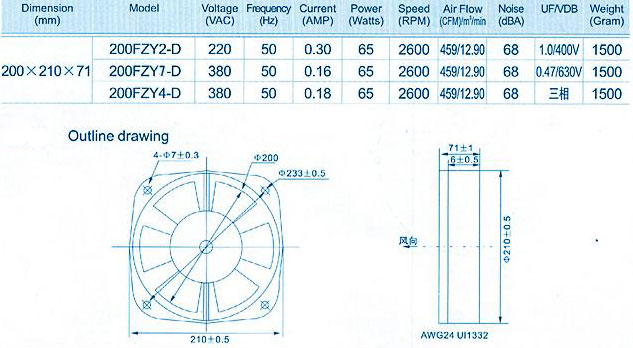
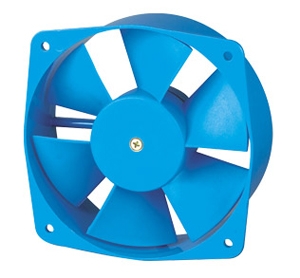
I think based on the size and table everything is clear ...
On bearings !!! Productivity: 280 cubic meters / hour.
Price: 3900 rubles.
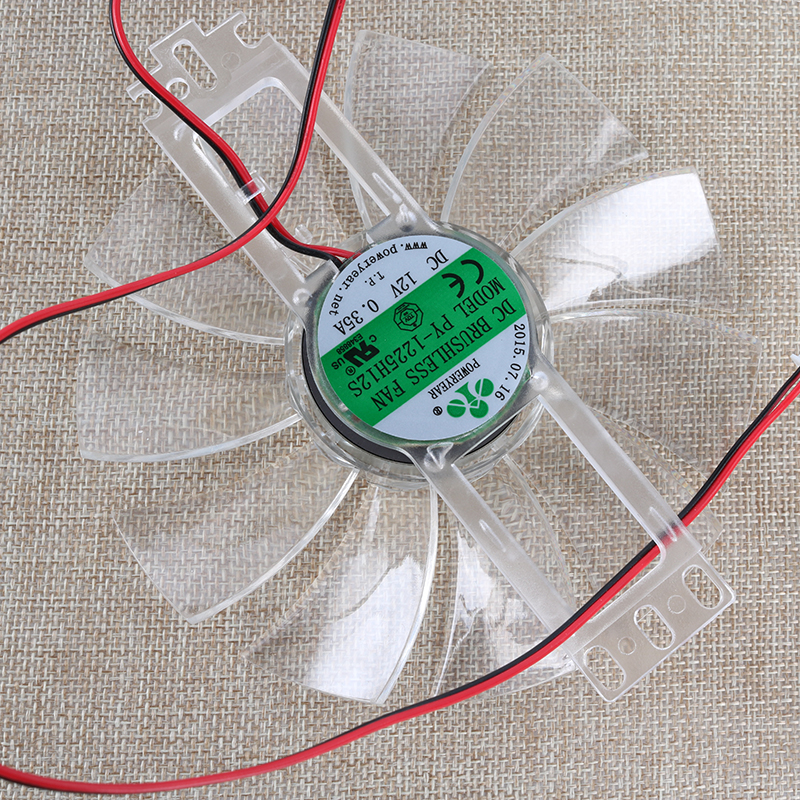
Axial fan for a homemade incubator with a diameter of 160mm.
The performance of this axial fan, at 220 volts: 1500 m3 / hour.
The description contains performance data (airflow) for the supply voltage: 110 - 380 volts.
Price: 4900 rubles.

Price: 890 rubles.
Fans for ventilation of the incubator (100 - 150mm.) Ask, there are many of them ...
Fan for a homemade 12 volt incubator.

 If desired, it is possible to choose a gear motor for the incubator for any need, a lot of options.
Price: 2400 rubles.
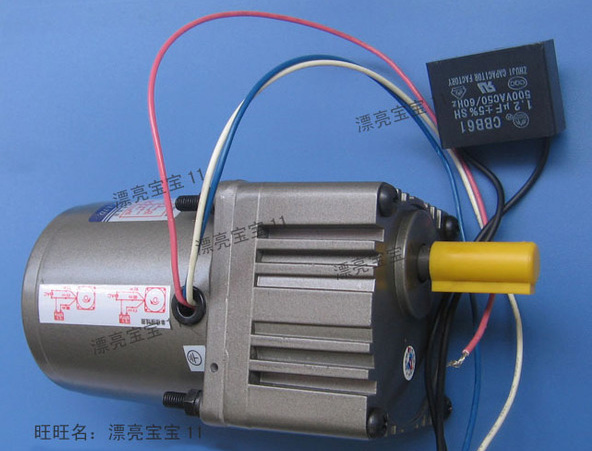
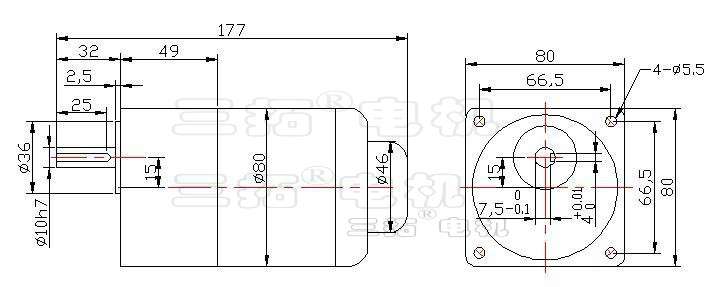
Reversible motor with gearbox for a home-made incubator for 220 volts / 14 watts.
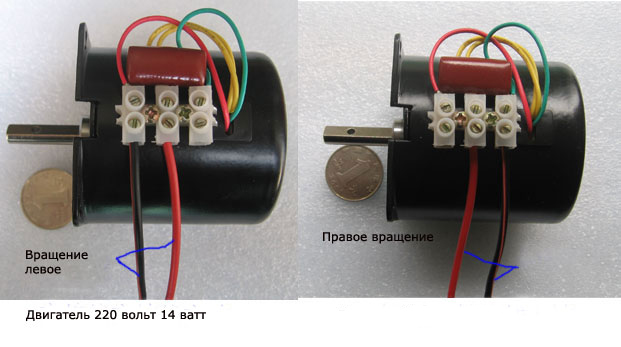
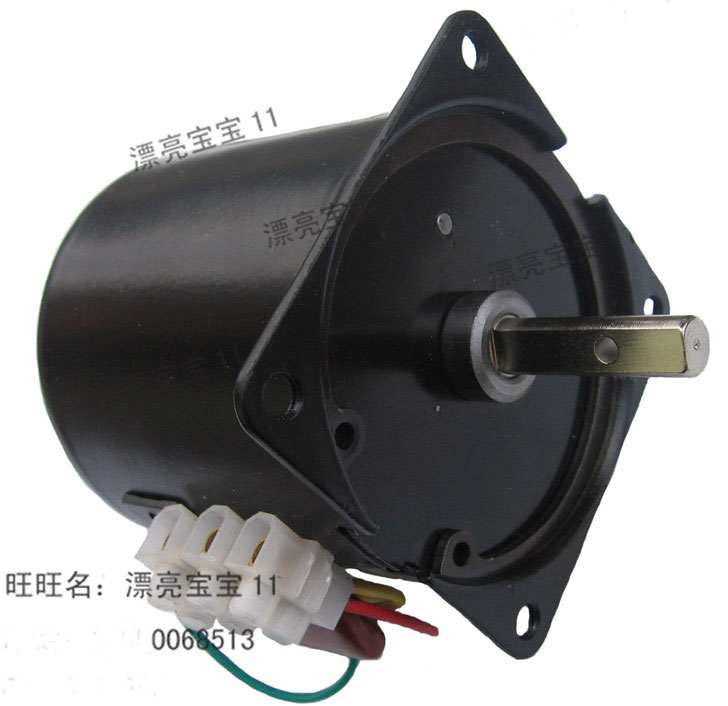
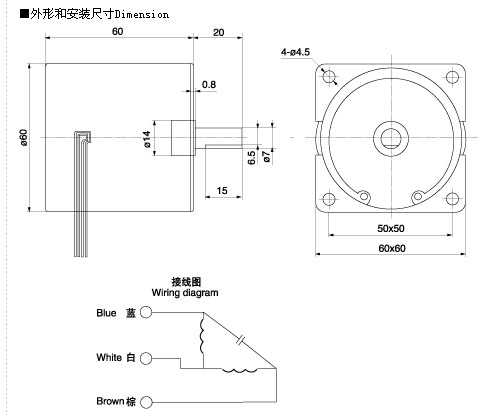
The most popular (and reliable) right now is the reversible gear motor for incubators. It is produced for a different number of revolutions, respectively, and for different traction. Unlike the domestic RD-09 engine, these motors are powered by 220 volts, that is, they do not need a step-down transformer to achieve full power. This series of reversible motors for the incubator is the best suited for t. in it, and in all well-known industrial temperature controllers, access to control the rotation of the trays by 220 volts. At the same time, the now fashionable actuators from satellite antennas are powered by a voltage of 36 volts. That is, they require a step-down transformer and complex relay isolation to switch the voltage. Definitely, these engines are the best choice when building a homemade incubator, because they work directly from the thermostat, and to change the rotation they need only the simplest limit switches.
- Engine power 220V 50Hz, cylindrical gearbox, metal wheels.
- The operating mode of the reversible gear motor is continuous with the possibility of frequent starts and braking.
- Insulation resistance, not less than 100 MΩ at 500VDC
- Dielectric strength, in 1000 for 1 minute
- Insulation Class B (130º)

From the table it is clear that the less revolutions on the shaft, the greater the pulling force.
Engine price: for 14 watts - 1,500 rubles.
For some reason, limit switches are expensive, perhaps because they are designed for high current, but still they control the engine
Left (10A. 250volt) - Price: 200 p. / Pcs. Right (5A. 250volt) - Price: 170 p. / Pcs.
Motor for drive trays in an incubator of 220 volts, 6 watts.
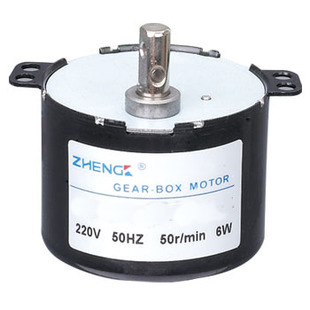
Reduction reversible motor to drive trays in the incubator.
Supply voltage: 220 volts. Power: 6 watts.
Available in the number of revolutions: 1、2.5、5、8.3、15、16.7、20、25、30、35、40、50、60、80、100、150 Accordingly, the smaller the number of revolutions, the greater the power on the shaft. Not all of course are available, ask.
Price: 1670 rubles.
Motor for drive trays in an incubator of 220 volts, 20 watts.
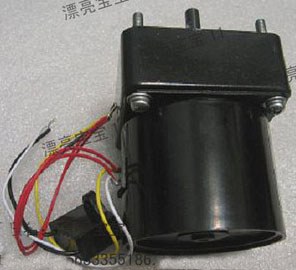

A more "solid" engine to drive trays in a makeshift incubator. Reinforced gearbox of this engine, can withstand trays with 1000 eggs.
Available at: 5, 15, 24, 47 rpm. Bollard pull, respectively: 60, 50, 31, 16 kg./cm.
Price: 6190 rubles.
The engine for driving trays in a large incubator for 220 volts, 25 watts.
Bearing units for tray drive mechanism.
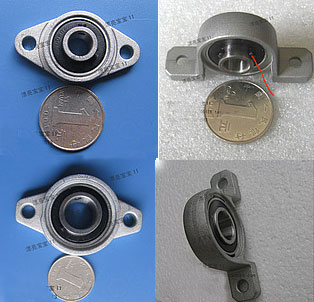
For any shaft diameter, ask.
Left row:
The inner diameter of the shaft is from 4 to 30 mm.
Price: under a shaft of 8 mm. - 180 rubles.
Price: under a shaft of 10 mm.-200 rubles.
under a shaft of 12 mm. - 230 rubles.
Right row:
Price: under a shaft of 8 mm.-210 rubles.
Price: under a shaft of 10 mm. - 240 rubles.
under a shaft of 12 mm. - 280 rubles.
A table of sizes of bearing bearings used in the drive tray of a makeshift incubator.
Hinges to drive trays in a makeshift incubator.
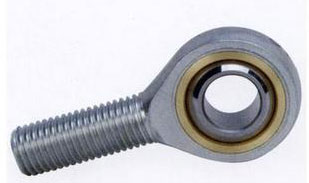
For what they are used, it can be seen from above in the photo. Without them, the tray drive (of any design) will not work !!!
The sizes under an axis are from 5-16 mm.
Hinge price with a hole for the axis-8mm .: 240 rubles. Ask for other sizes.
Device for controlling the speed of an AC motor.
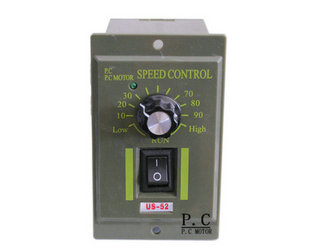
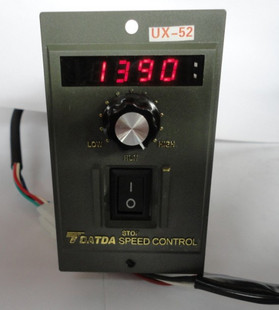
It can be used to control the speed of the fan motor in the incubator.
Many are now asking where to get a low-revving engine for blowing trays in a makeshift incubator. I honestly do not know, you can certainly apply reduction engines (they are higher), but you can use this device. If a fan is installed on the motor axis, for example, from a washing machine and powered through this device, it will be possible to adjust the engine speed from 150 to 1390 rpm. It turns out the ideal fan for blowing trays in a homemade incubator.
There are two types of regulator, with and without indicator.
The price of the device with an indicator: 2400 rubles Without an indicator: 1800 rubles.
In recent years, in agriculture, hatcheries are widely used to remove young animals. The use of incubators has been shown to be highly effective both for large agricultural enterprises and for small households.
As a rule, incubators with electric heating are used. Among electric incubators, the most advanced are incubators with infrared heating. Such incubators have several advantages compared to other types of electric incubators (lamp and heating elements). First of all, heating using infrared radiation provides a significant reduction in energy costs. Energy savings are achieved due to the fact that the thermal energy from infrared emitters is transferred directly to heated objects (in this case, eggs), and the air in the incubator is heated already from heated eggs. Another advantage of using the infrared heating method in incubators is the ability to control the temperature in the incubator and the long life of the emitter itself. In addition, due to the wide selection of infrared emitters, it is usually possible to choose the emitter module that is best suited for a particular incubator.
 An example of an infrared emitter is the ECZ infrared lamp with an E27 screw cap. usually screwed into a special ceramic lampholder - similar to the one used for conventional incandescent bulbs. Due to the resistance of ceramics to the influence of high temperatures, such cartridges do not dry out and do not melt during operation, as is the case with plastic cartridges.
Infrared emitters are usually installed at the top of the incubator chamber - so as to ensure uniform heating of the surface on which the eggs are located. Depending on the size of the incubator, the number of emitters may be different. Infrared heated incubators are fully automated: with a given frequency, the surface with the eggs rotates in order to ensure their uniform heating from different directions.
The problem of maintaining the necessary humidity in the incubator is solved simply - a container of water is placed inside the incubator, which evaporates under the influence of infrared rays.
Infrared heaters - This is one of the types of infrared heaters that are often used to heat industrial and domestic premises. IR heaters are made on the basis of ceramic infrared emitters, therefore they do not glow, have great mechanical strength and are absolutely safe. The main advantage of such heaters is the ability to create different temperature zones in one room.
The emitter of the ECZ and ECX series is made in the form of an electric bulb (screw cap E27) with an air cushion inside the housing. Maximum surface temperatureMany summer residents and owners of private households decide to engage in poultry farming. There can be a lot of motives for such ideas. This is an additional income from the sale of chicks or adult poultry meat, and purely aesthetic pleasure, and the desire to eat environmentally friendly meat and eggs. Therefore, later in this article we will describe in detail how to organize incubator heating: types, methods and features of work.
Destination
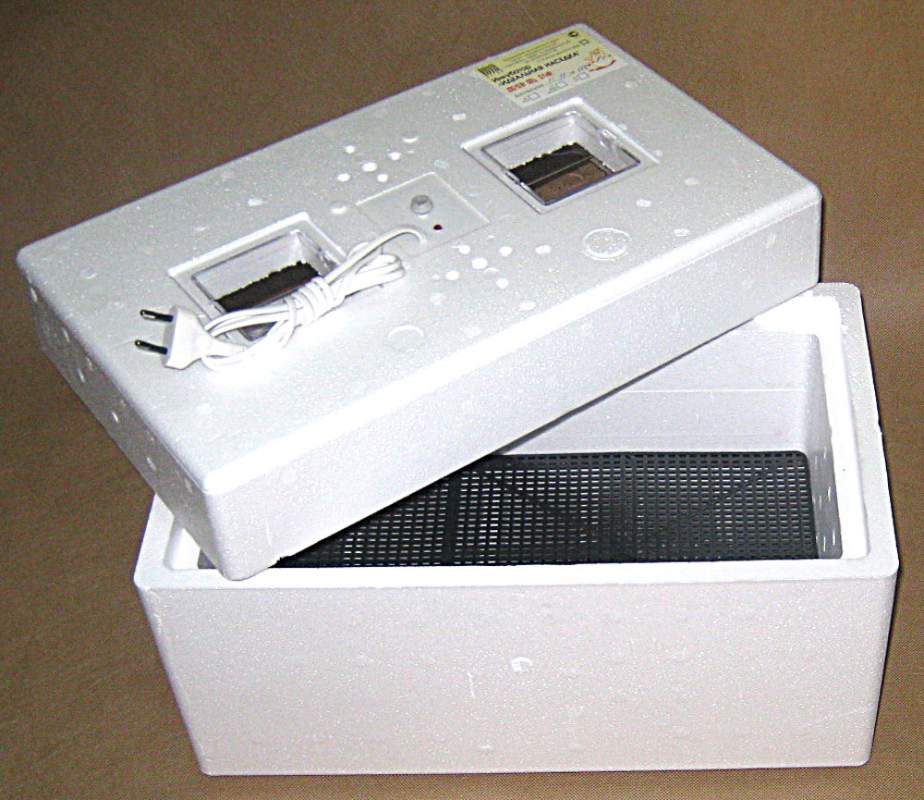
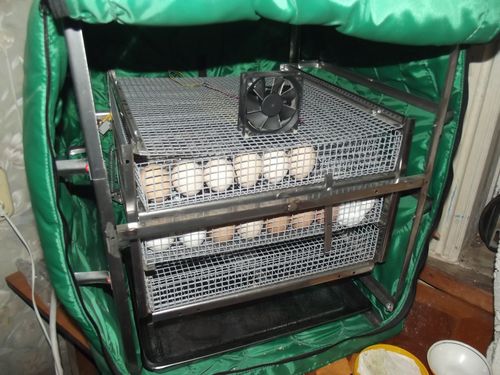
Take a closer look at the following photo. Here is an incubator. Such equipment is used by farmers to regularly breed offspring of poultry. It allows you to get chicks exactly at the moment when it is necessary for a person and in the amount that he needs.
However, in fairness, we note that a hatchery will be successful only if the owner of the household will strictly follow all the rules for the removal of chicks using such equipment. Violation of the lighting regime, temperature or humidity level can lead to the death of the embryos in the eggs.

That is why it is so important enough to know exactly how to arrange incubator heating with your own hands and what you need to get for this (underfloor heating panels, infrared film, LEDs, heating elements, fan heater, hydrocarbon wire, etc.). After all, each of the above methods is characterized by certain disadvantages and advantages, by comparing which you can understand which of this is most efficient and simple to organize yourself.
What is the most successful heating method?
In fact, there is no clear answer to this question. Feedback from farmers suggests that much in this matter depends on the specific conditions of incubation. And, including, from the experience of the farmer in this matter. However, further we still try to find the answer to the question of which heating is better for the incubator.
We use incandescent lamps
Often a person decides to follow the simplest, at first glance, path, and organizes the next incubator heating: an incandescent lamp is installed inside the unit, the heat from which heats the eggs in the trays. The light sources must be placed at the correct distance so that the heat from them is evenly distributed throughout the space inside the incubator. On average, they are mounted at a distance of 10 cm from each other.
However, this method, according to experienced farmers, is complicated by the fact that there is a risk of rapid combustion of lamps, as in the case of heating the unit from the inside by heating elements. Often this leads to the melting of the walls of the unit, and in rare cases, the legs can even explode, which negatively affects the condition of future chicks. In addition, this option is not so low cost, because now electricity is not a cheap pleasure.
Underfloor Technology
If you decide to do the incubator heating with underfloor heating panels with your own hands, then you should understand that such a method of thermoregulation inside the equipment can cost decent money. Moreover, the choice of such heating elements is not so high.
The use of a carbon thermal conduit is considered to be a great opportunity to heat incubator equipment with your own hands. This is a new word in incubator business.
Infrared film
Infrared heating of the incubator is also quite popular recently. This is an innovative material that heats the space due to the emission of infrared light. To improve the uniformity of heating, the film must be concentrated in the center, and along the perimeter of the unit it should be half as much. Moreover, the heating element itself does not burn and does not ignite, which has a very positive effect on the efficiency of the incubation process. In addition, it is worth noting that due to this method, it is possible to reduce energy consumption by attaching a reflective substrate of this kind to the film and equipping the equipment with an automatic temperature regulator.
LED strip
To equip high-quality incubator heating with LEDs, you need to place them in the right way. An excessively large step between the LEDs will lead to an uneven distribution of heat over the space, which means that not all testicles receive the amount of heat necessary for the development of the embryos. So, along the perimeter, the tape should be positioned more rarely than in the center of the unit.
Note that this heating method is quite economical, since the energy consumption in this case is quite low. For even greater savings, you should definitely buy a temperature controller that will control the temperature regime inside the equipment.
Gas or water
Many craftsmen try to heat eggs in trays with hot water, the steam from which rises. However, this is a very difficult way, which is suitable for those cases when the electricity unexpectedly disappears for a long time. Units of this kind are also rarely heated with gas. This is an unsafe method, however, sometimes this method can save eggs from death.

Thermal Measures
It is clear even to an inexperienced farmer that poor thermal insulation of the incubation equipment will become an obstacle to the effective removal of chicks of any kind of poultry. Therefore, it is imperative to achieve the tightness of the unit casing so that the heat emitted by the heating element (infrared film, LEDs, etc.) does not leak out.
In addition, it is good to have a fan heater or an air mixer. Such products contribute to a uniform distribution of heat throughout the interior of incubation equipment. The video below provides detailed instructions on how to organize the right heating for the incubation equipment with your own hands.